How to Clean Up Your WordPress Media Library
Find and fix broken metadata, missing thumbnails, and stale URLs in your WordPress media library — free, with StaticQ Media's built-in scanners.
Every WordPress site accumulates media library clutter. You switch themes and the old thumbnail sizes become dead weight. You enable WebP but your existing images don’t have WebP variants. You migrate hosts and stale URLs get baked into your post content. A proper WordPress media library cleanup is something most site owners know they need but never get around to — because doing it manually is tedious and risky.
StaticQ Media includes two scanners that handle the two most common types of mess: the Media Library Scanner for file and metadata integrity, and the Post Content Scanner for stale image URLs in your posts. Here’s how to use them.
What Goes Wrong in a Media Library
Before jumping in, it helps to understand the two types of problems:
1. Metadata and file issues. WordPress tracks each image in two places: the database (attachment post + metadata) and the filesystem (the actual files). These drift apart over time. A thumbnail size gets removed from your theme but the old sizes stay in metadata. You enable WebP but existing images don’t have WebP variants. The database says an image was uploaded to R2 but the cloud copy is missing. The Media Library Scanner catches all of this.
2. Stale URLs in post content. When you write a post in WordPress, image URLs are hardcoded into the post body as HTML. If your domain changes, your CDN changes, or you switch to different thumbnail sizes, those URLs go stale. They don’t update automatically. The Post Content Scanner finds them.
Step 1: Install StaticQ and Register Your Media
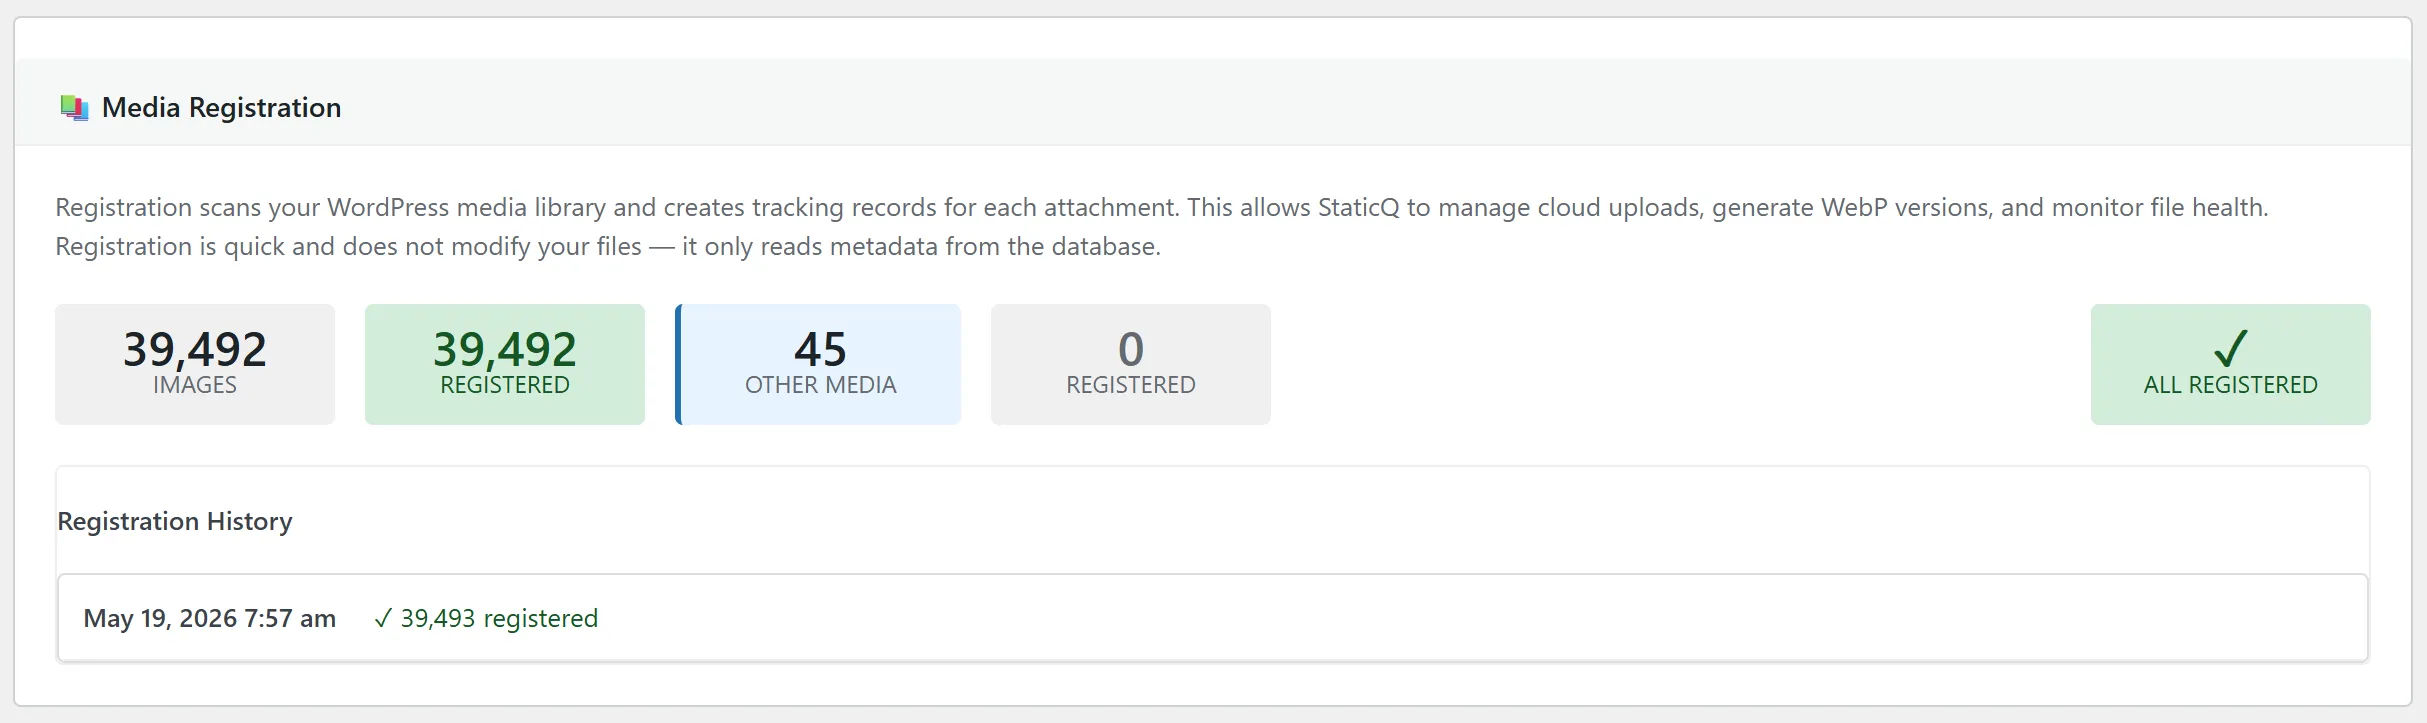
If you haven’t already, install StaticQ Media and go to StaticQ > Media Manager. Click Register Unregistered Attachments to index your existing library. This is a quick, read-only operation — it creates tracking records without modifying anything.
Step 2: Run the Media Library Scanner
Click Scan Media Library. The scanner compares every registered attachment against your current WordPress settings. For each image, it checks:
- Do all the expected thumbnail sizes exist on disk?
- Does the metadata (dimensions, filesize) match reality?
- If WebP is enabled, do WebP variants exist?
- If cloud offloading is enabled, are the R2 copies in sync?
The scan runs in batches — it won’t time out on large libraries. When it finishes, you’ll see a clear summary of every issue found, grouped by category.
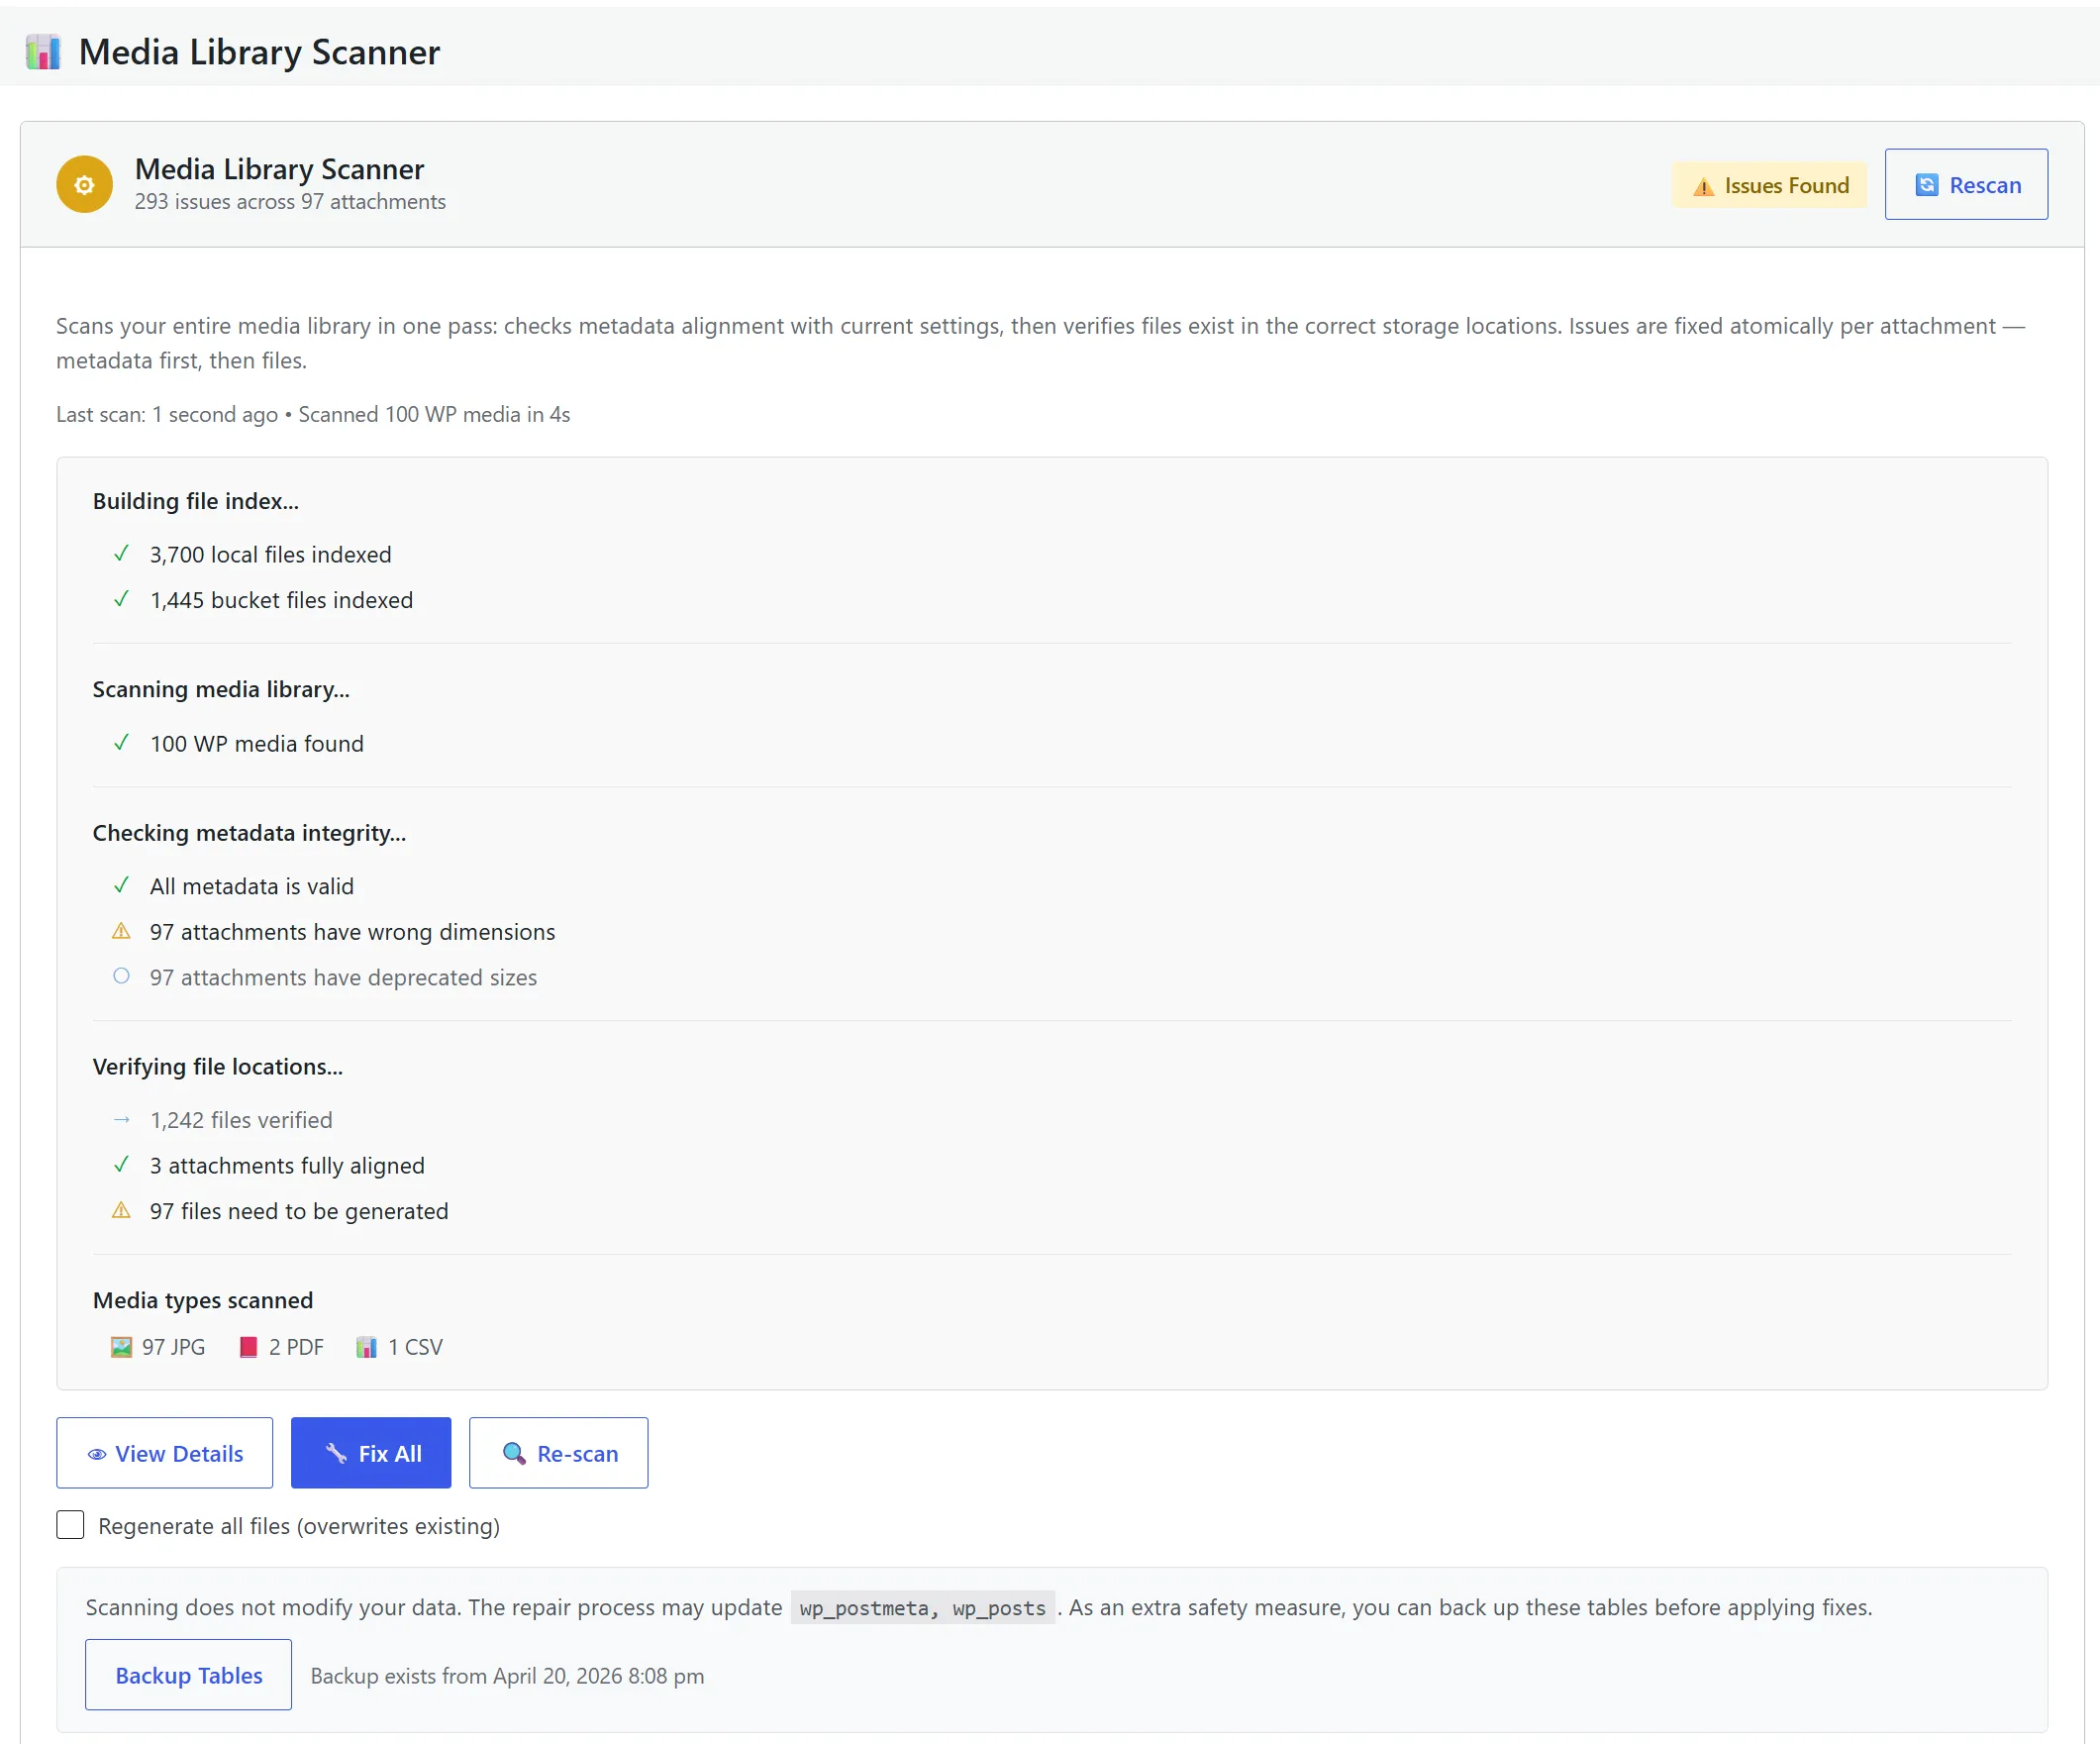
Step 3: Review the Results
The scanner groups issues by type so you know exactly what’s wrong:
- Missing sizes — a thumbnail size is defined in WordPress but the file doesn’t exist
- Missing WebP — WebP conversion is enabled but variants haven’t been generated
- Corrupted metadata — dimensions, filesize, or size definitions don’t match the actual files
- Wrong dimensions — an existing thumbnail has the wrong width or height
- Deprecated sizes — your metadata references sizes that your current theme no longer uses
- Storage sync gaps — a file exists locally but not in R2, or vice versa
Each issue is fixable. You can expand individual attachments to see the details, or move straight to fixing everything.
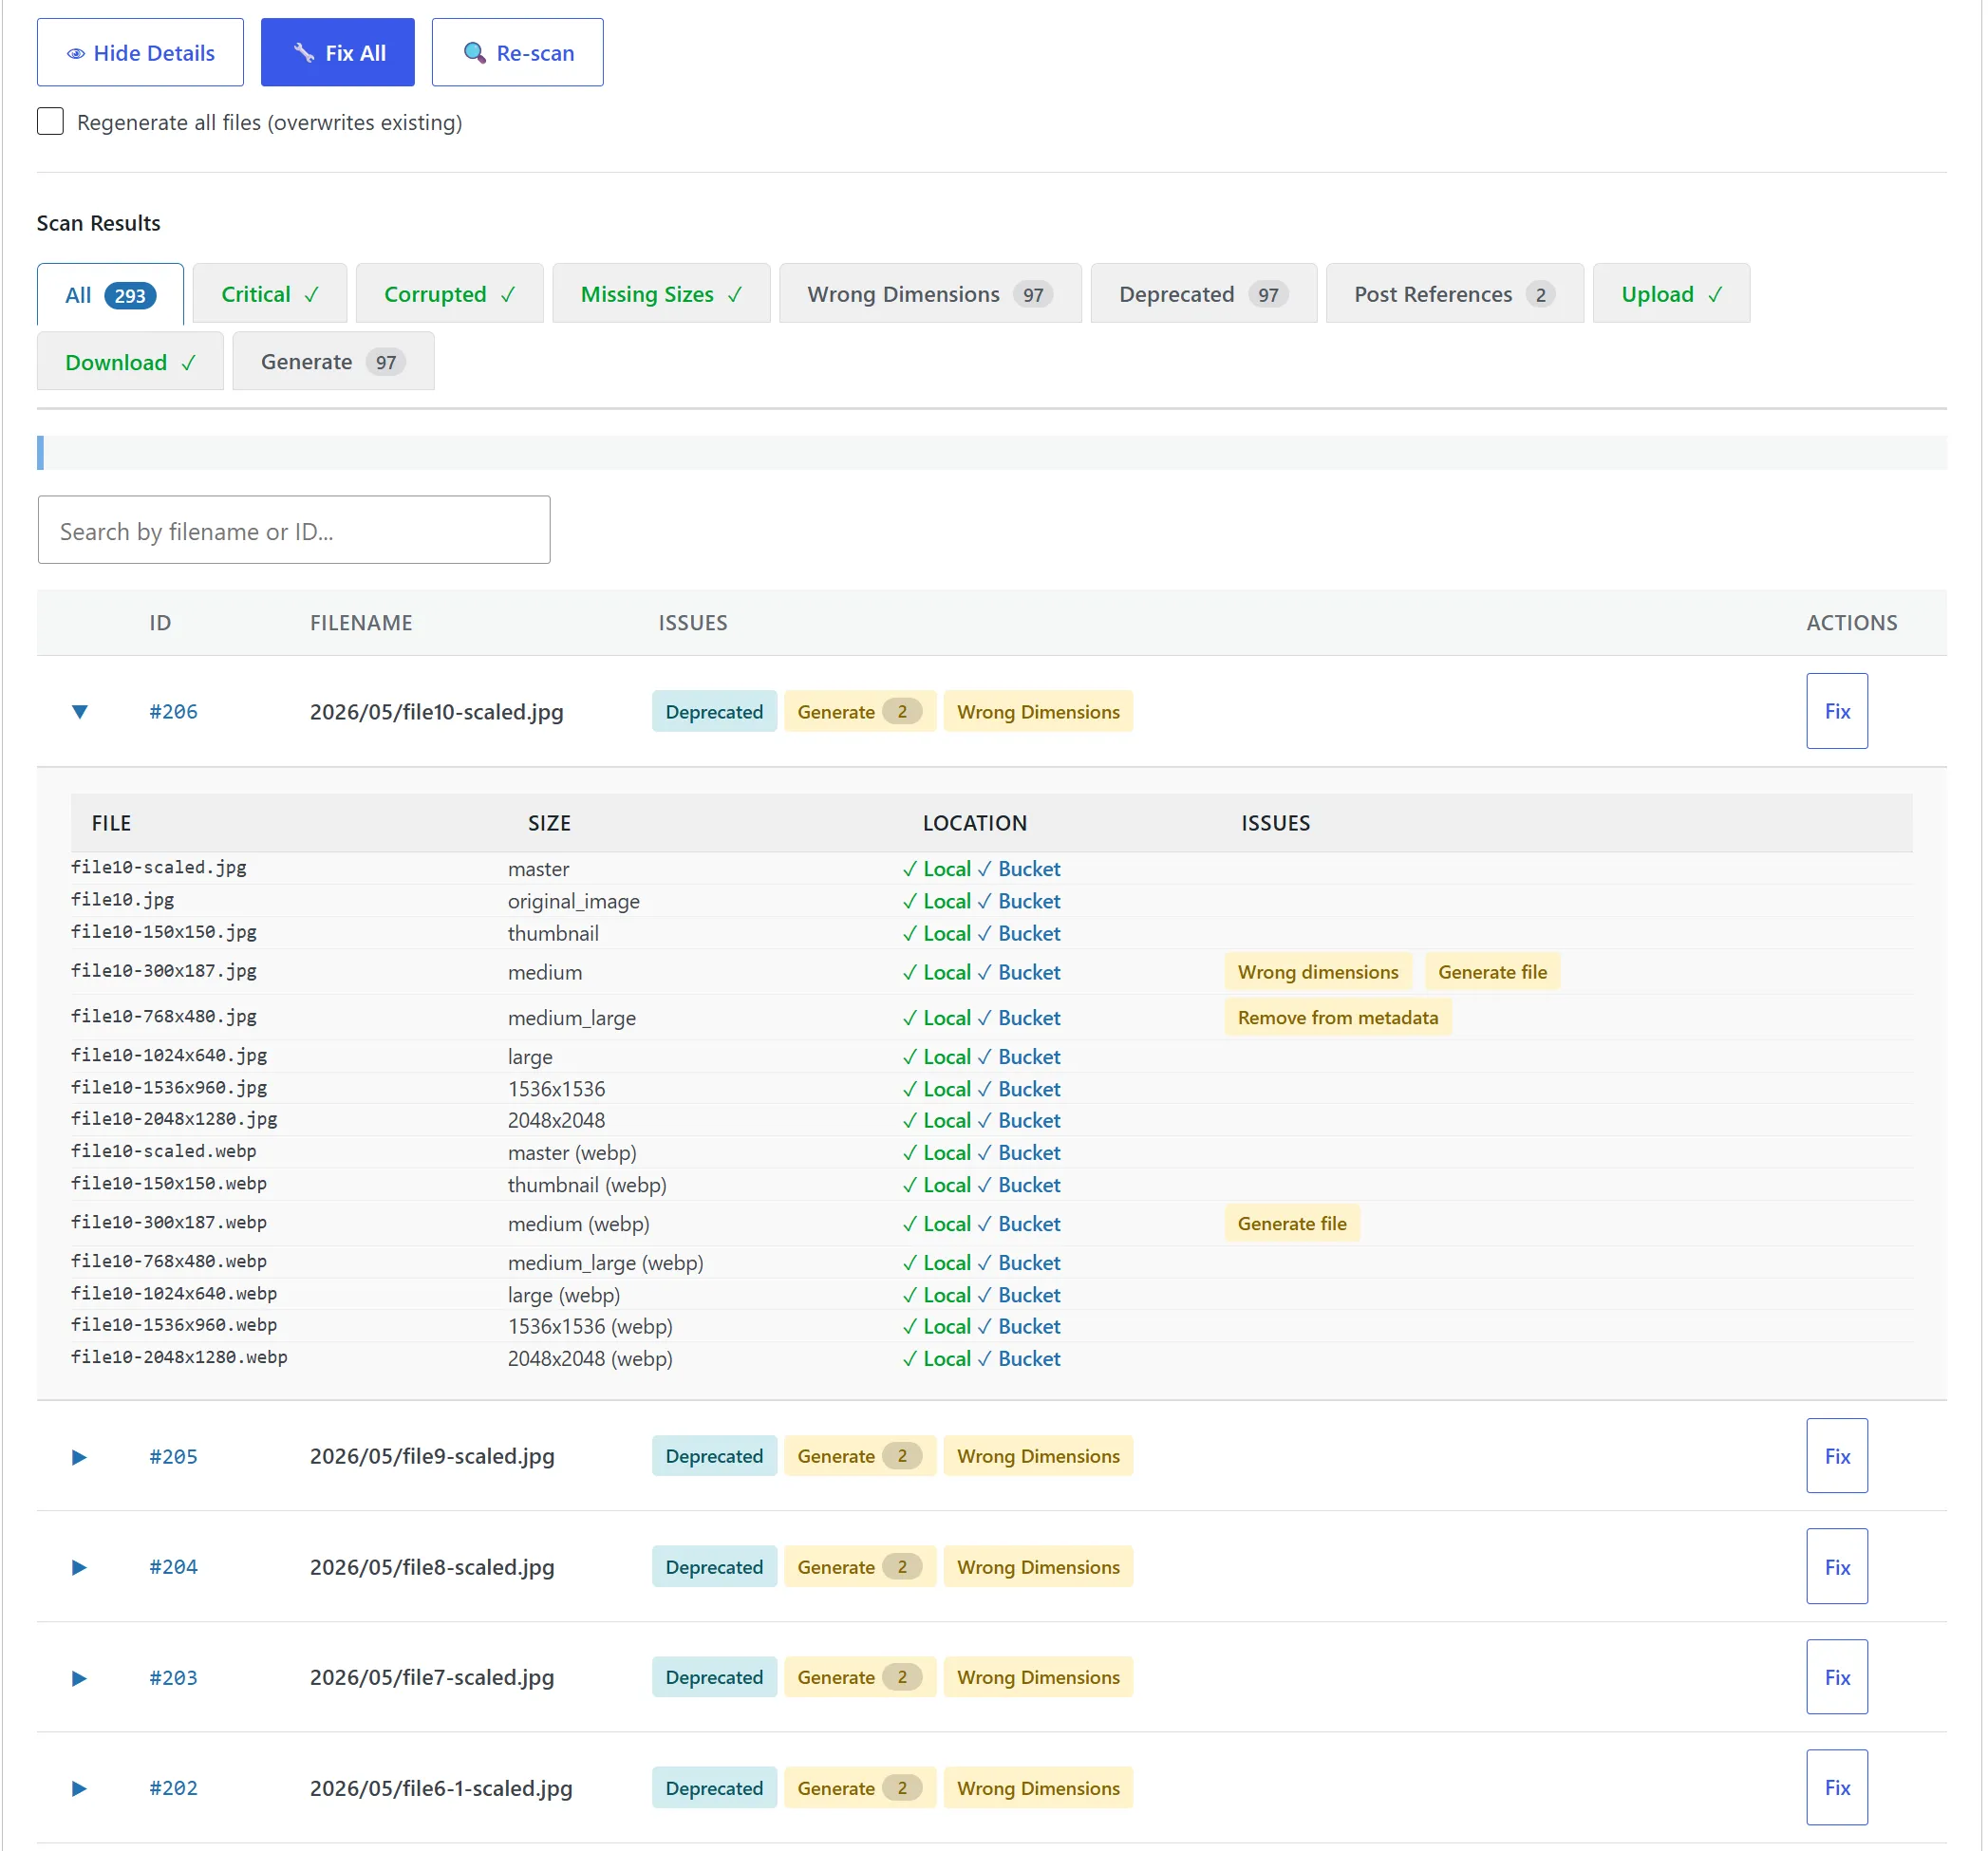
Step 4: Fix All
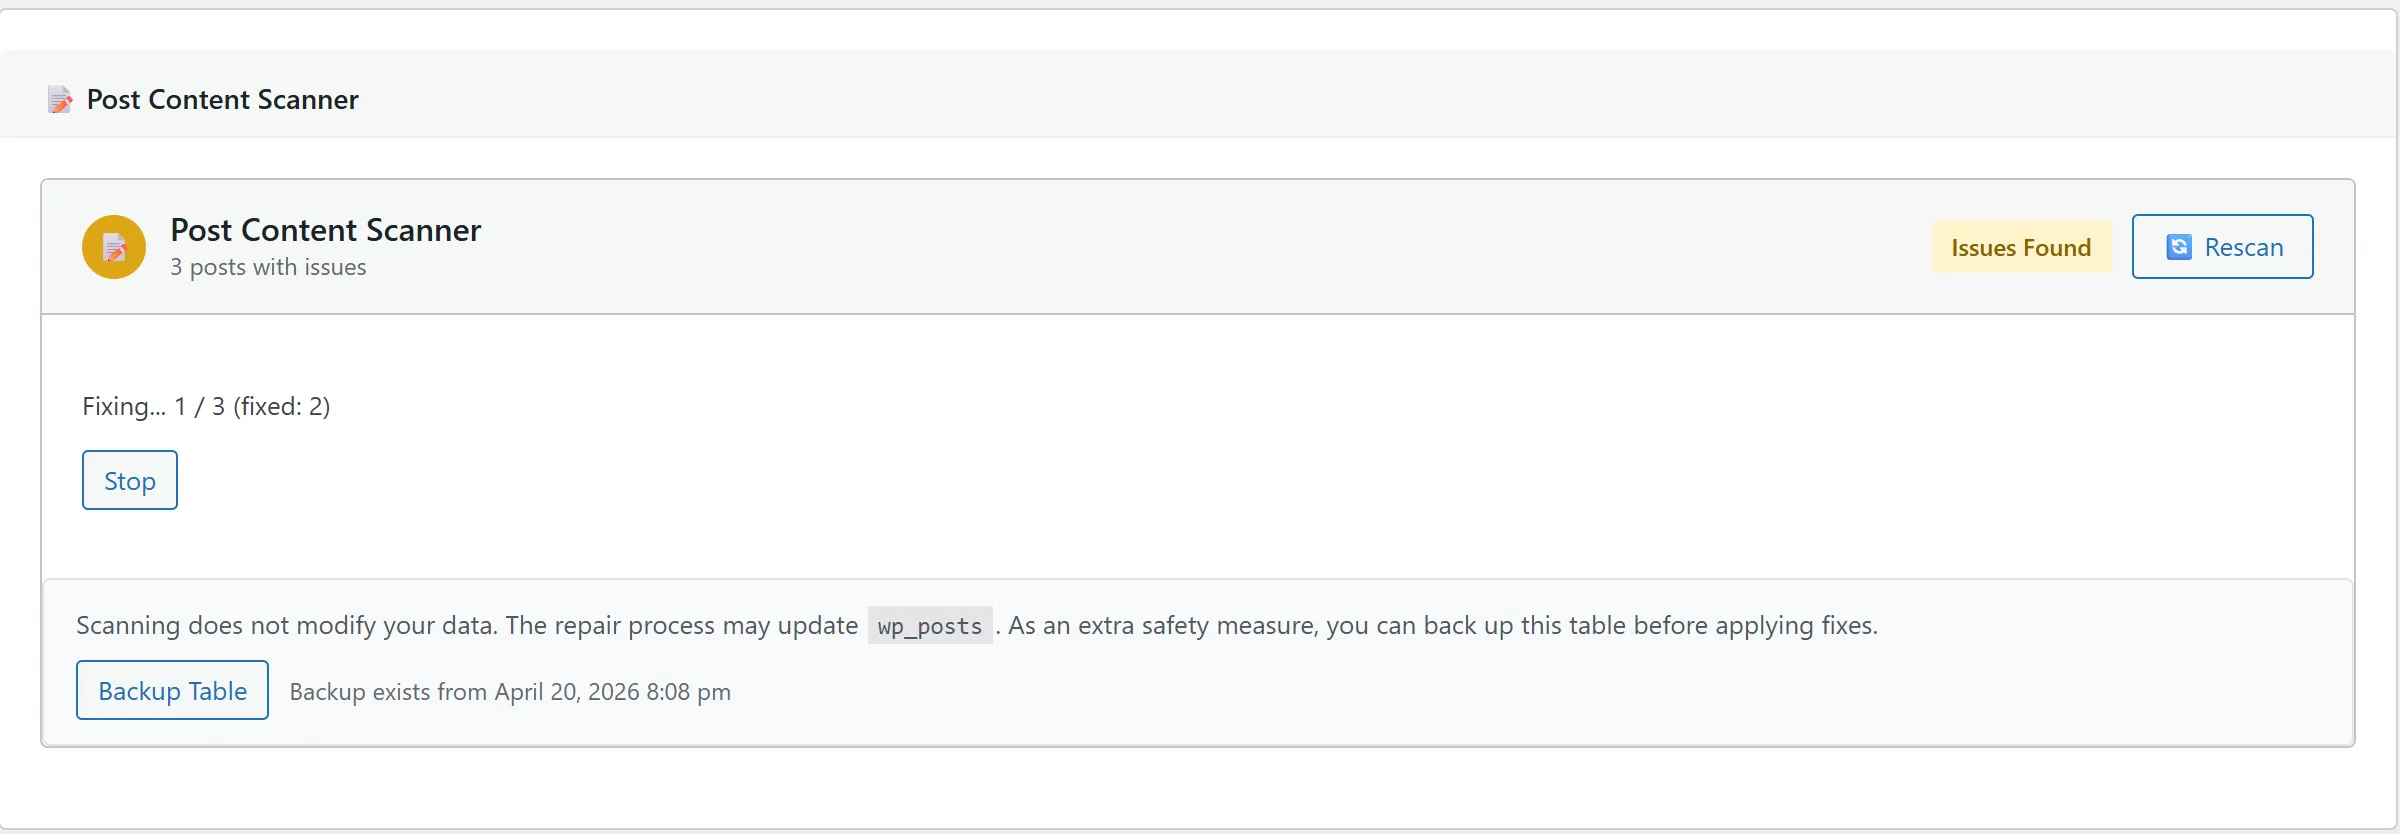
Click Fix All. StaticQ works through every issue:
- Missing thumbnail sizes are regenerated
- Missing WebP variants are created
- Files that should be on R2 but aren’t are uploaded
- Metadata is corrected to match the actual filesystem state
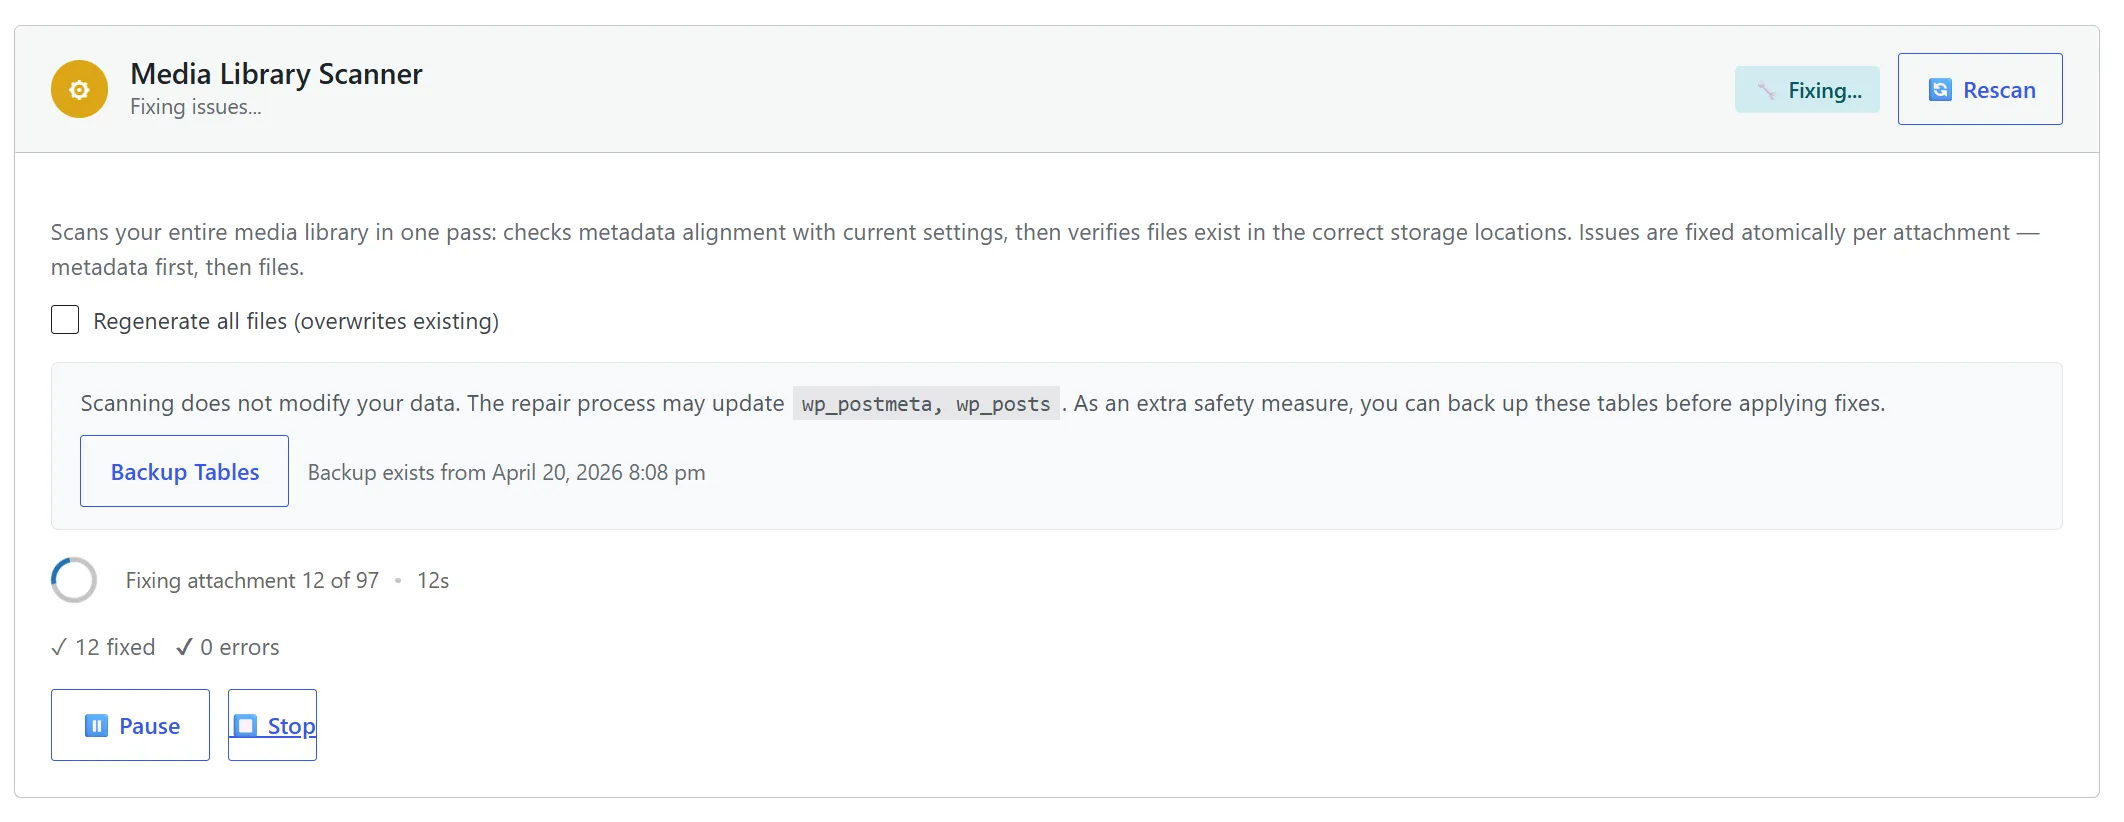
The repair processes in controlled batches with a live progress bar — no CPU spikes, no timeouts. When it’s done, re-scan to verify: you should see zero issues.
Step 5: Check Your Post Content
Now that your files are in order, check whether your posts reference them correctly. Go to the Post Content Scanner section and click Scan Post Content.
This scanner reads through every post, page, and custom post type in your database — regardless of publication status. For each image URL it finds, it checks:
- Does the URL use your current domain, or does it reference an old domain or CDN?
- Does the image filename match current attachment metadata, or is it a stale size reference?
- Does the referenced attachment still exist in your media library?
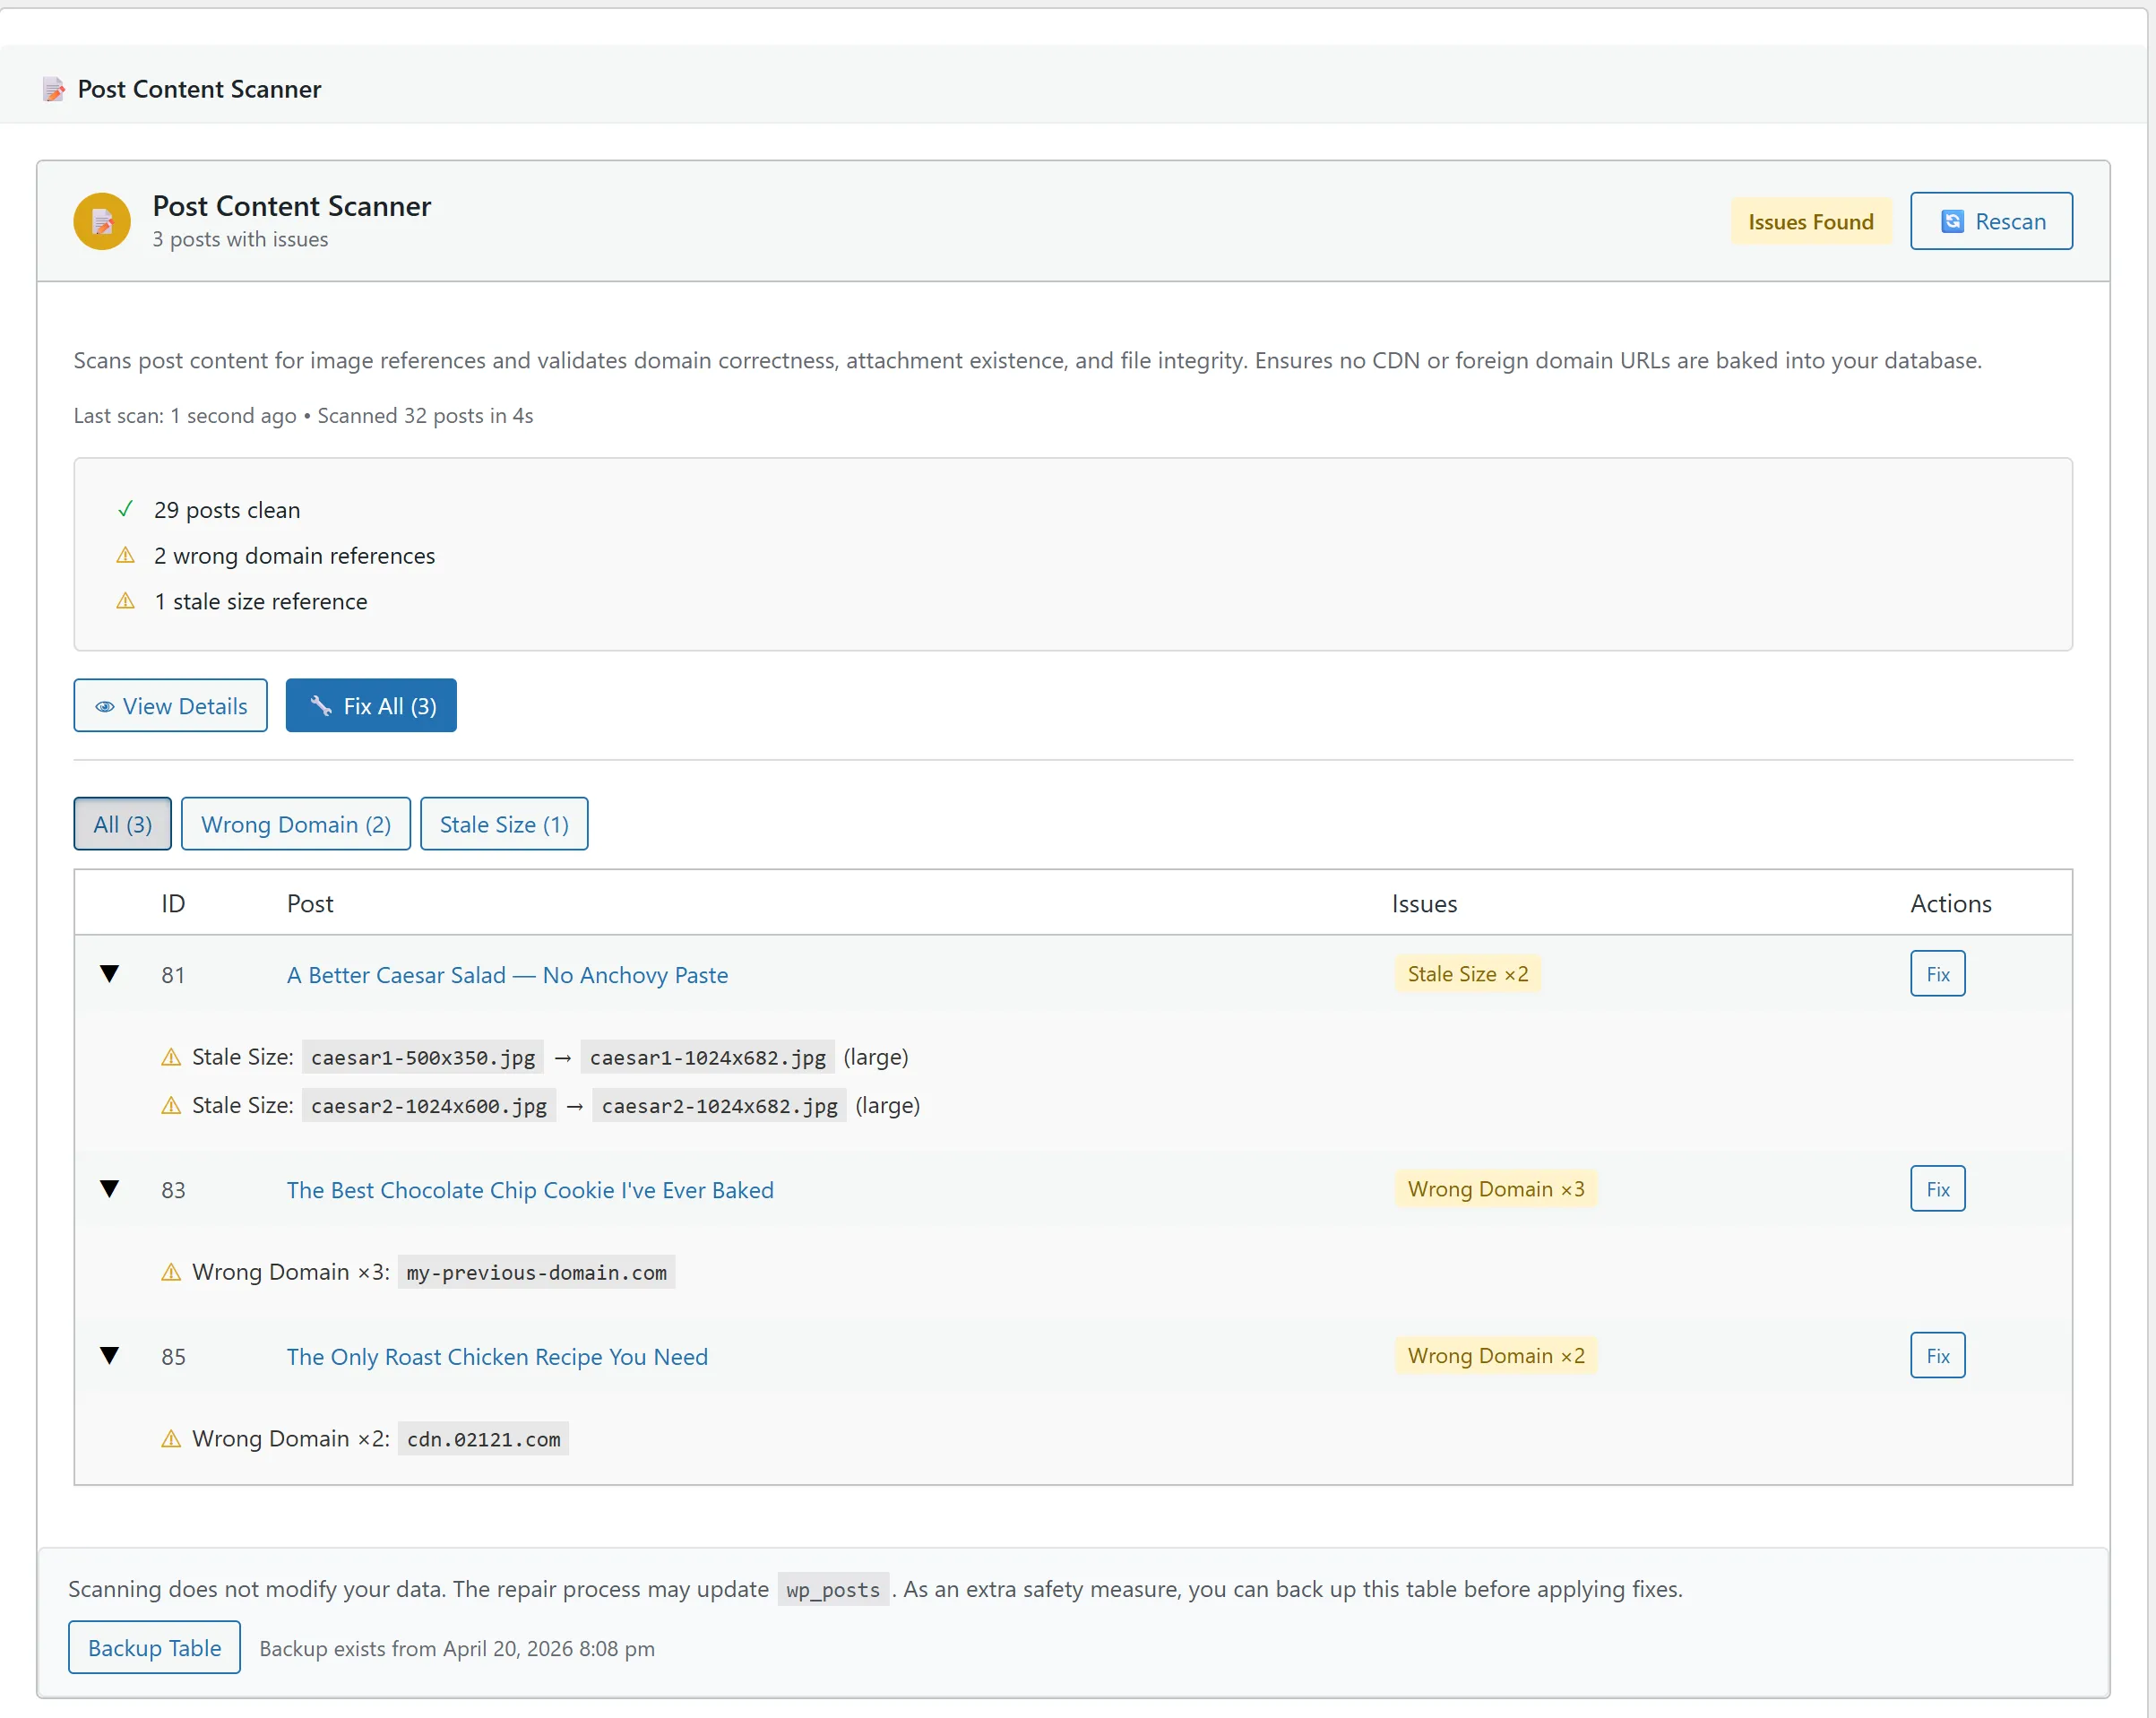
Step 6: Fix Stale URLs
Review the results. The scanner categorizes issues by type:
- Wrong domain — URL points to an old domain or CDN. Auto-fixable.
- Stale size reference — filename doesn’t match current metadata. Auto-fixable.
- Deleted attachment — the image was removed from your library. Reported for manual review.
- Broken URL — can’t be matched to any attachment. Reported for manual review.
Back up your wp_posts table first (StaticQ has a built-in backup button), then click Fix All to rewrite the fixable URLs. For deleted attachments and broken URLs, you’ll need to re-upload the missing image or update the post manually — the scanner tells you exactly which posts are affected.
Going Further: Orphan File Detection
The scanners above fix what’s broken. But your uploads folder may also contain files that aren’t broken — they’re just not needed anymore. Old thumbnails from a previous theme, remnants of deleted plugins, files from failed imports.
StaticQ’s Orphan Detection tool finds files in your uploads directory (and cloud bucket) that aren’t referenced by any WordPress attachment. It doesn’t delete them — it quarantines them so you can test your site before committing. If something breaks, restore with one click.
This is entirely optional. Your site works fine with orphan files — they just take up disk space and make backups larger. If that doesn’t bother you, skip it. If it does, check out our guide to finding and removing orphan files.
A Cleaner Library in 10 Minutes
The Media Library Scanner and Post Content Scanner together take about 10 minutes for a typical site. The result: every file accounted for, every thumbnail matching your current settings, every URL in your posts pointing to the right image.
You don’t need to run both scanners together. Changed themes? Run the Media Library Scanner. Migrated domains? Run the Post Content Scanner. They’re independent tools for independent problems.
And because StaticQ Media is completely free — no subscriptions, no credit limits — you can run these on every site you manage.